Whether you have a question, need assistance, or want to learn more about our services, we’re here to help every step of the way with information and advice.
Need help with installation?
We offer professional misting system installation through our independent installers across the greater DFW area, with more metro locations coming soon.
If DIY isn’t your thing, you’re short on time, or just unsure how to install your system – no worries, we’ve got you covered.
Our standard residential and commercial installation covers full setup, assuming you already have water and power connections, pump shelter and overhead structures (like patio roofs, arbors, or walls at the right height).
If you are located outside the DFW area, we offer full support to help guide you or your preferred installer through the process – from planning to completion.
For installation pricing and availability, please contact us directly. We’re here to help make the process seamless from start to finish.
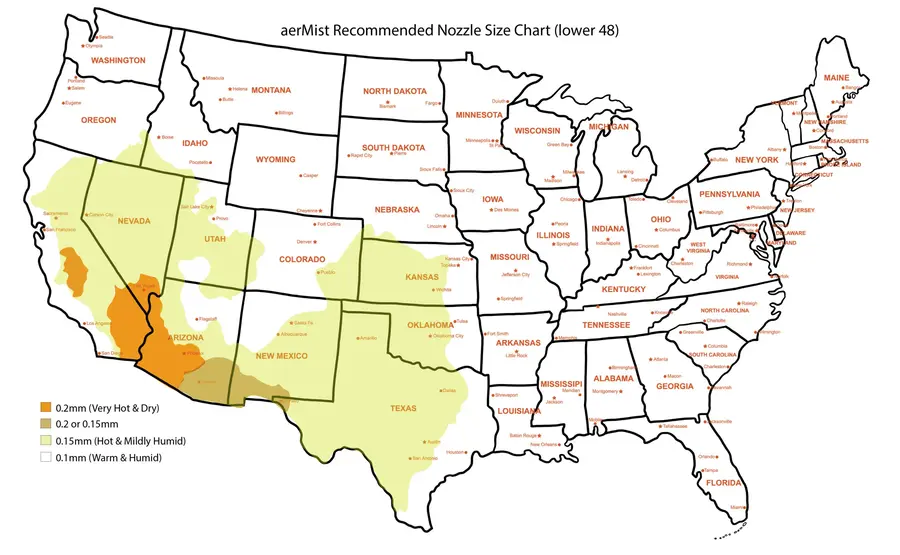
Choosing the right nozzle depends on your climate and outdoor layout
Recommended nozzle sizes:
Tip: If your misting line is installed lower than 9ft or airflow is limited, choose one size smaller nozzle for better performance.
Check our Climate Map to easily find the perfect nozzle for your location. Please check here for larger, easier to read chart.
Number of misting nozzles required to provide optimum cooling for your space depends on the type and configuration of the space itself.
Fully open areas without a hard top roof lose cooled air and mist the fastest and thus require a higher number of nozzles, while spaces with hard top roof and closed sides will require fewer.
Use our Misting Configurator Tool to find the ideal number of nozzles and best setup for your space – and instantly calculate your price!
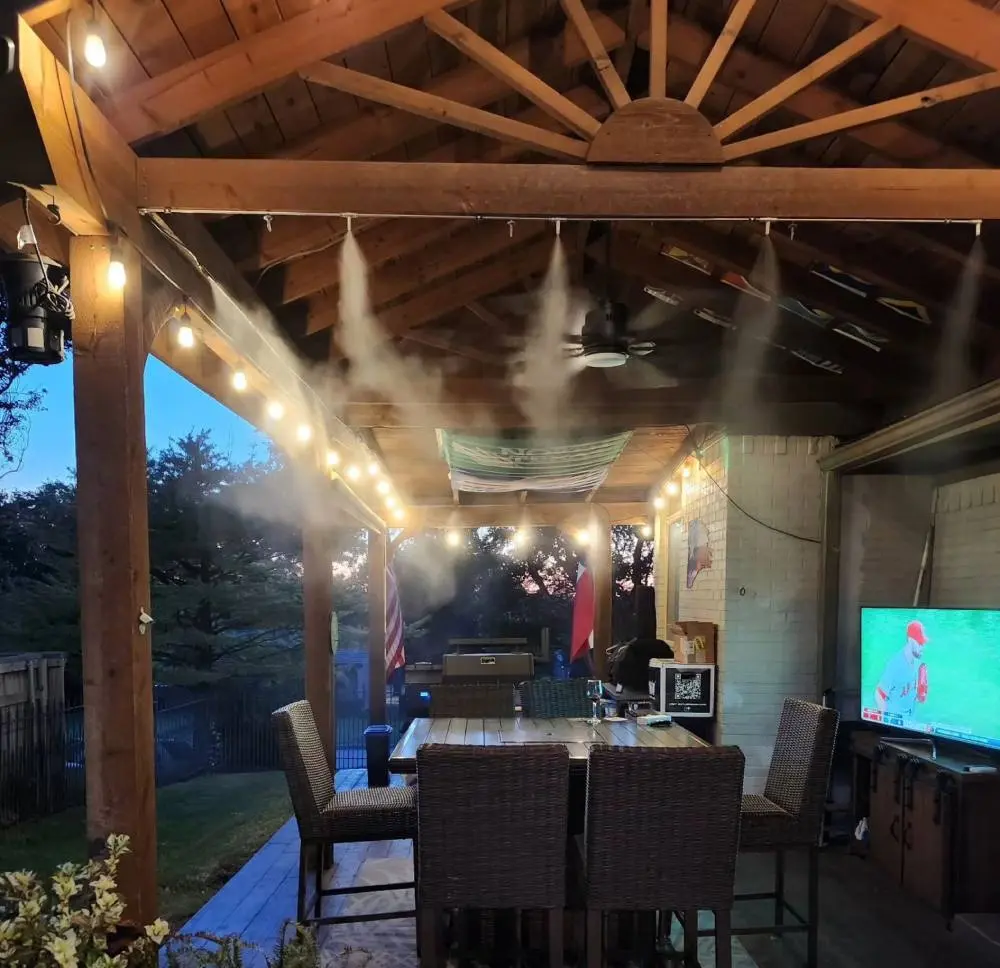
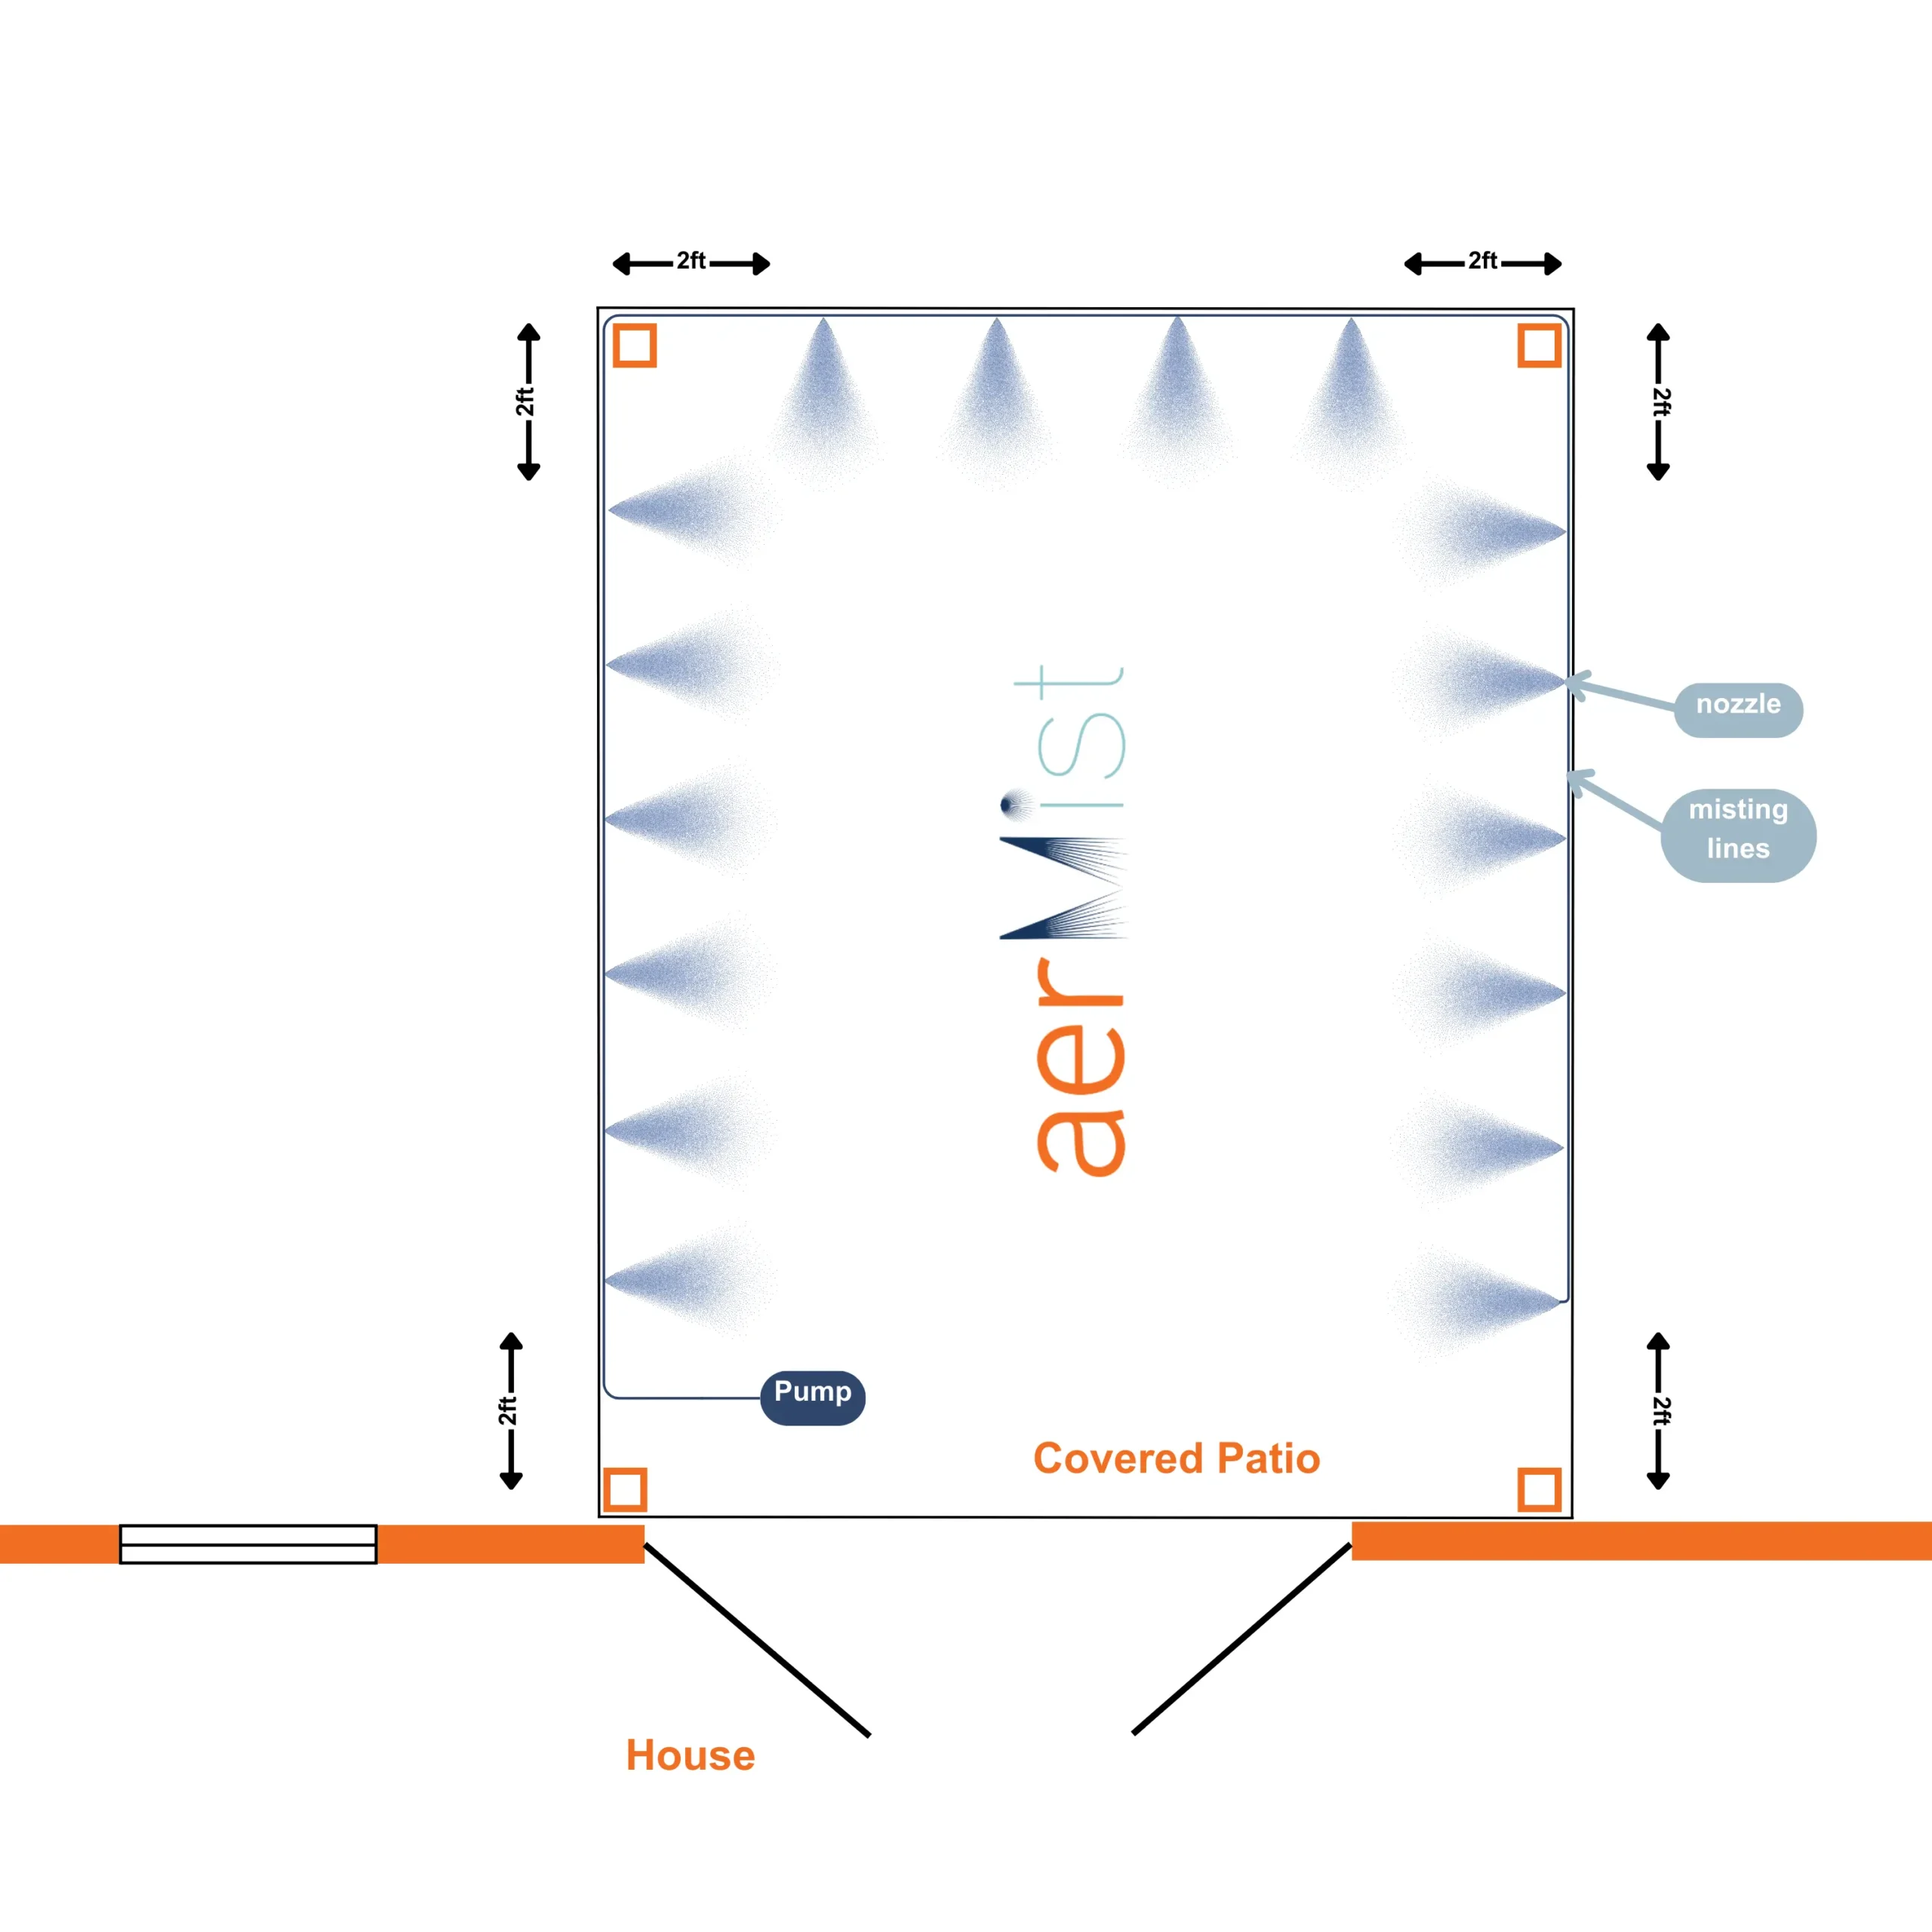
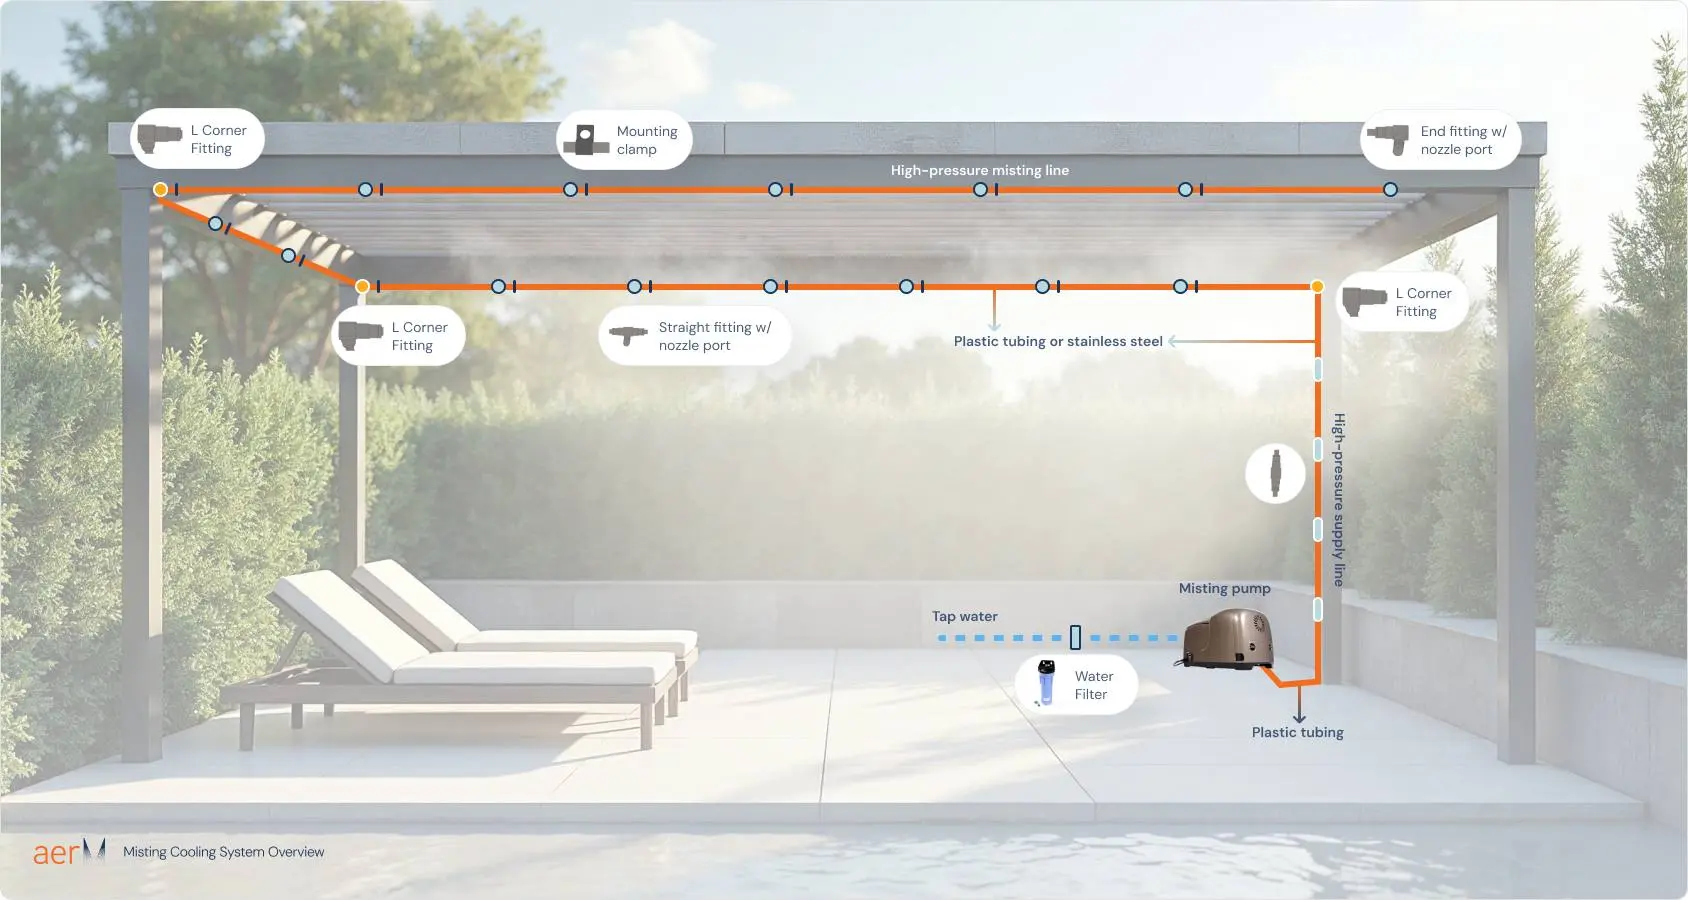
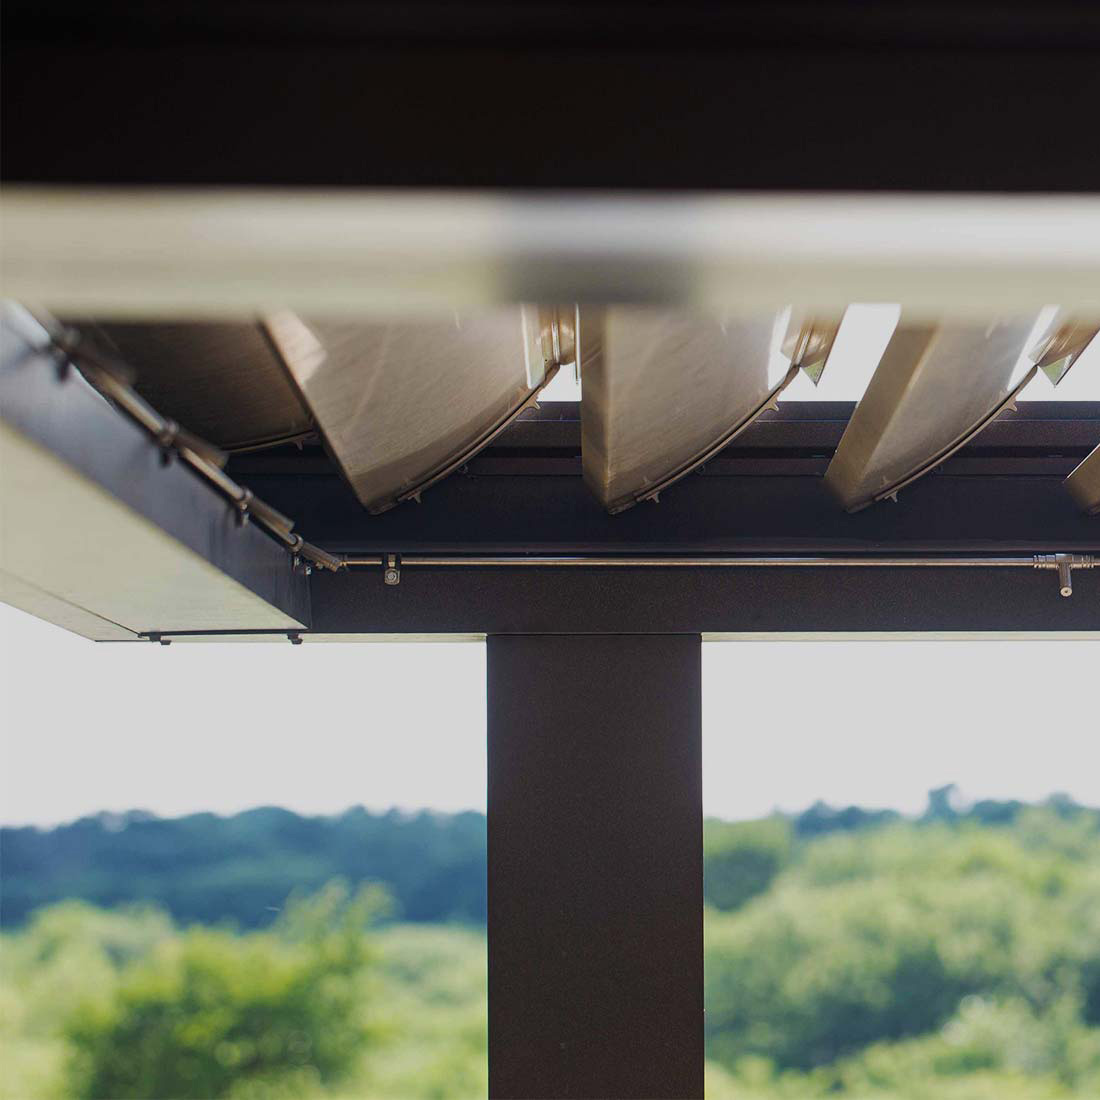
The best place to install a misting line is on an overhead structure like a patio roof or arbor.
Install the misting line between 8ft and 14ft (ideal is 10–12ft). If installing below 9ft, we recommend downsizing nozzle size by one.
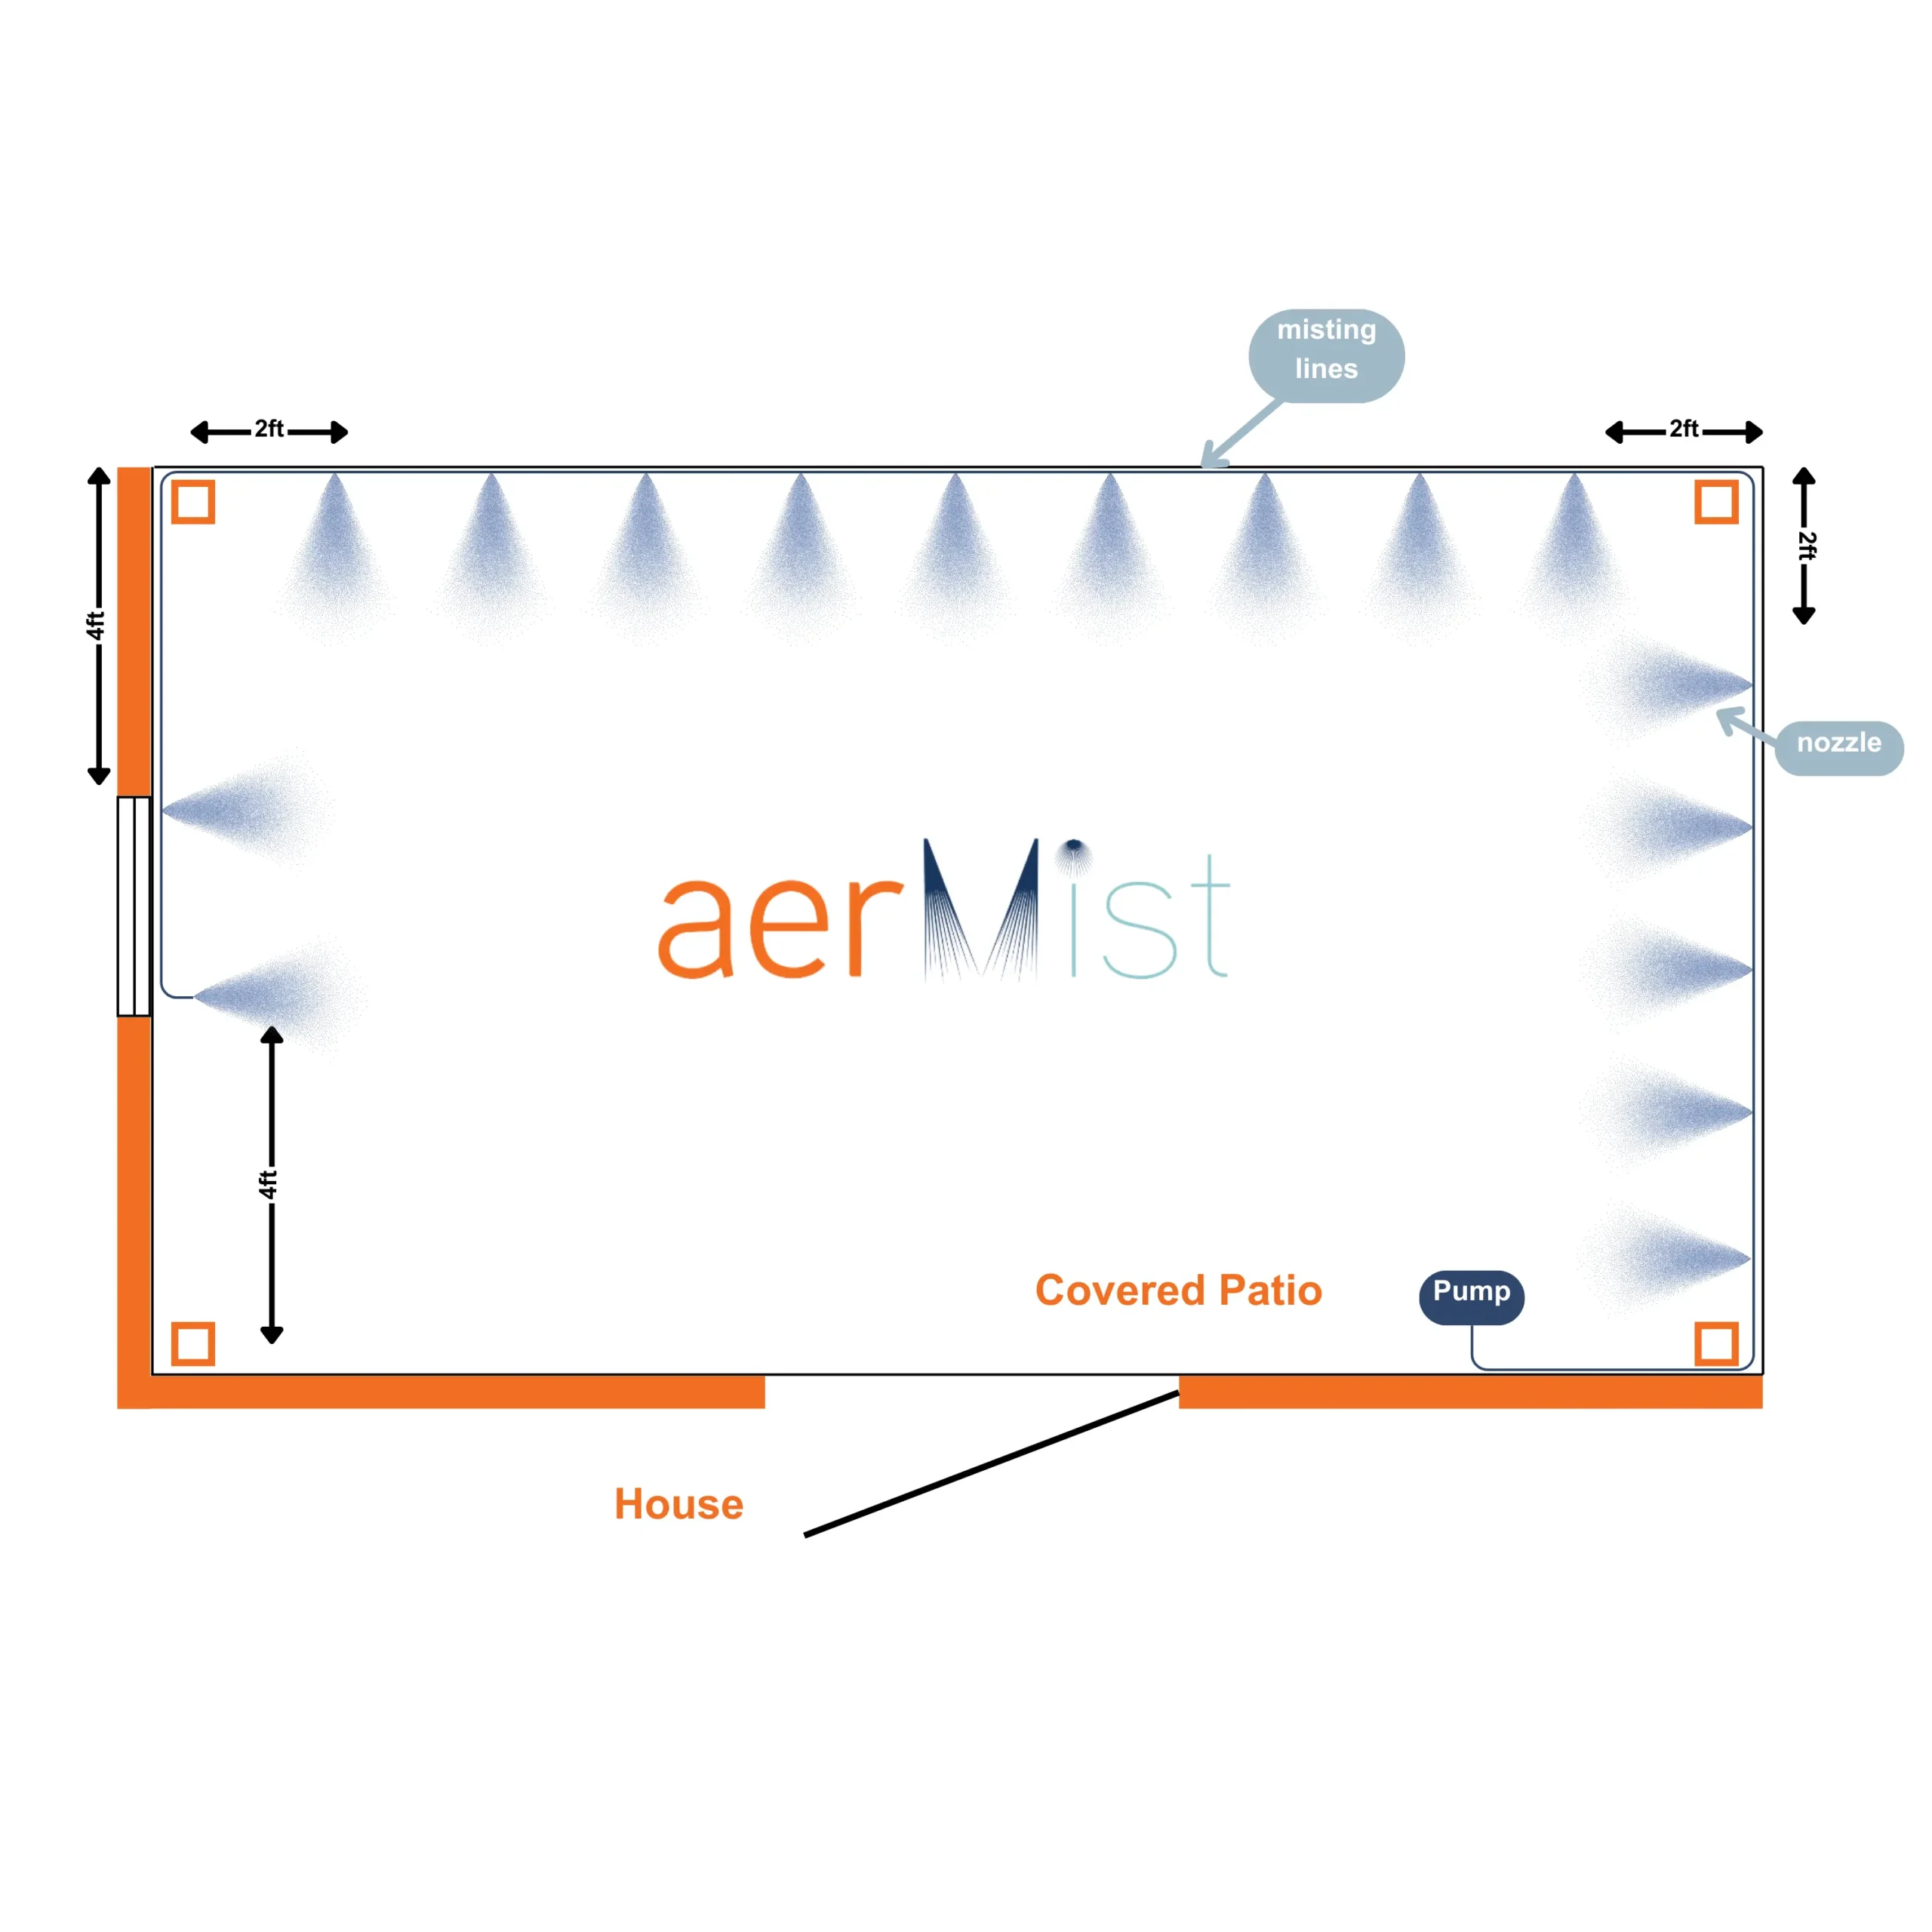
Place nozzles 2ft apart and angle them to fill the space with mist. Placing nozzles outside, or pointing them away from the space will reduce the cooling effect.
Misting lines can be placed along both open and closed sides, but as a general guideline, use open sides first.
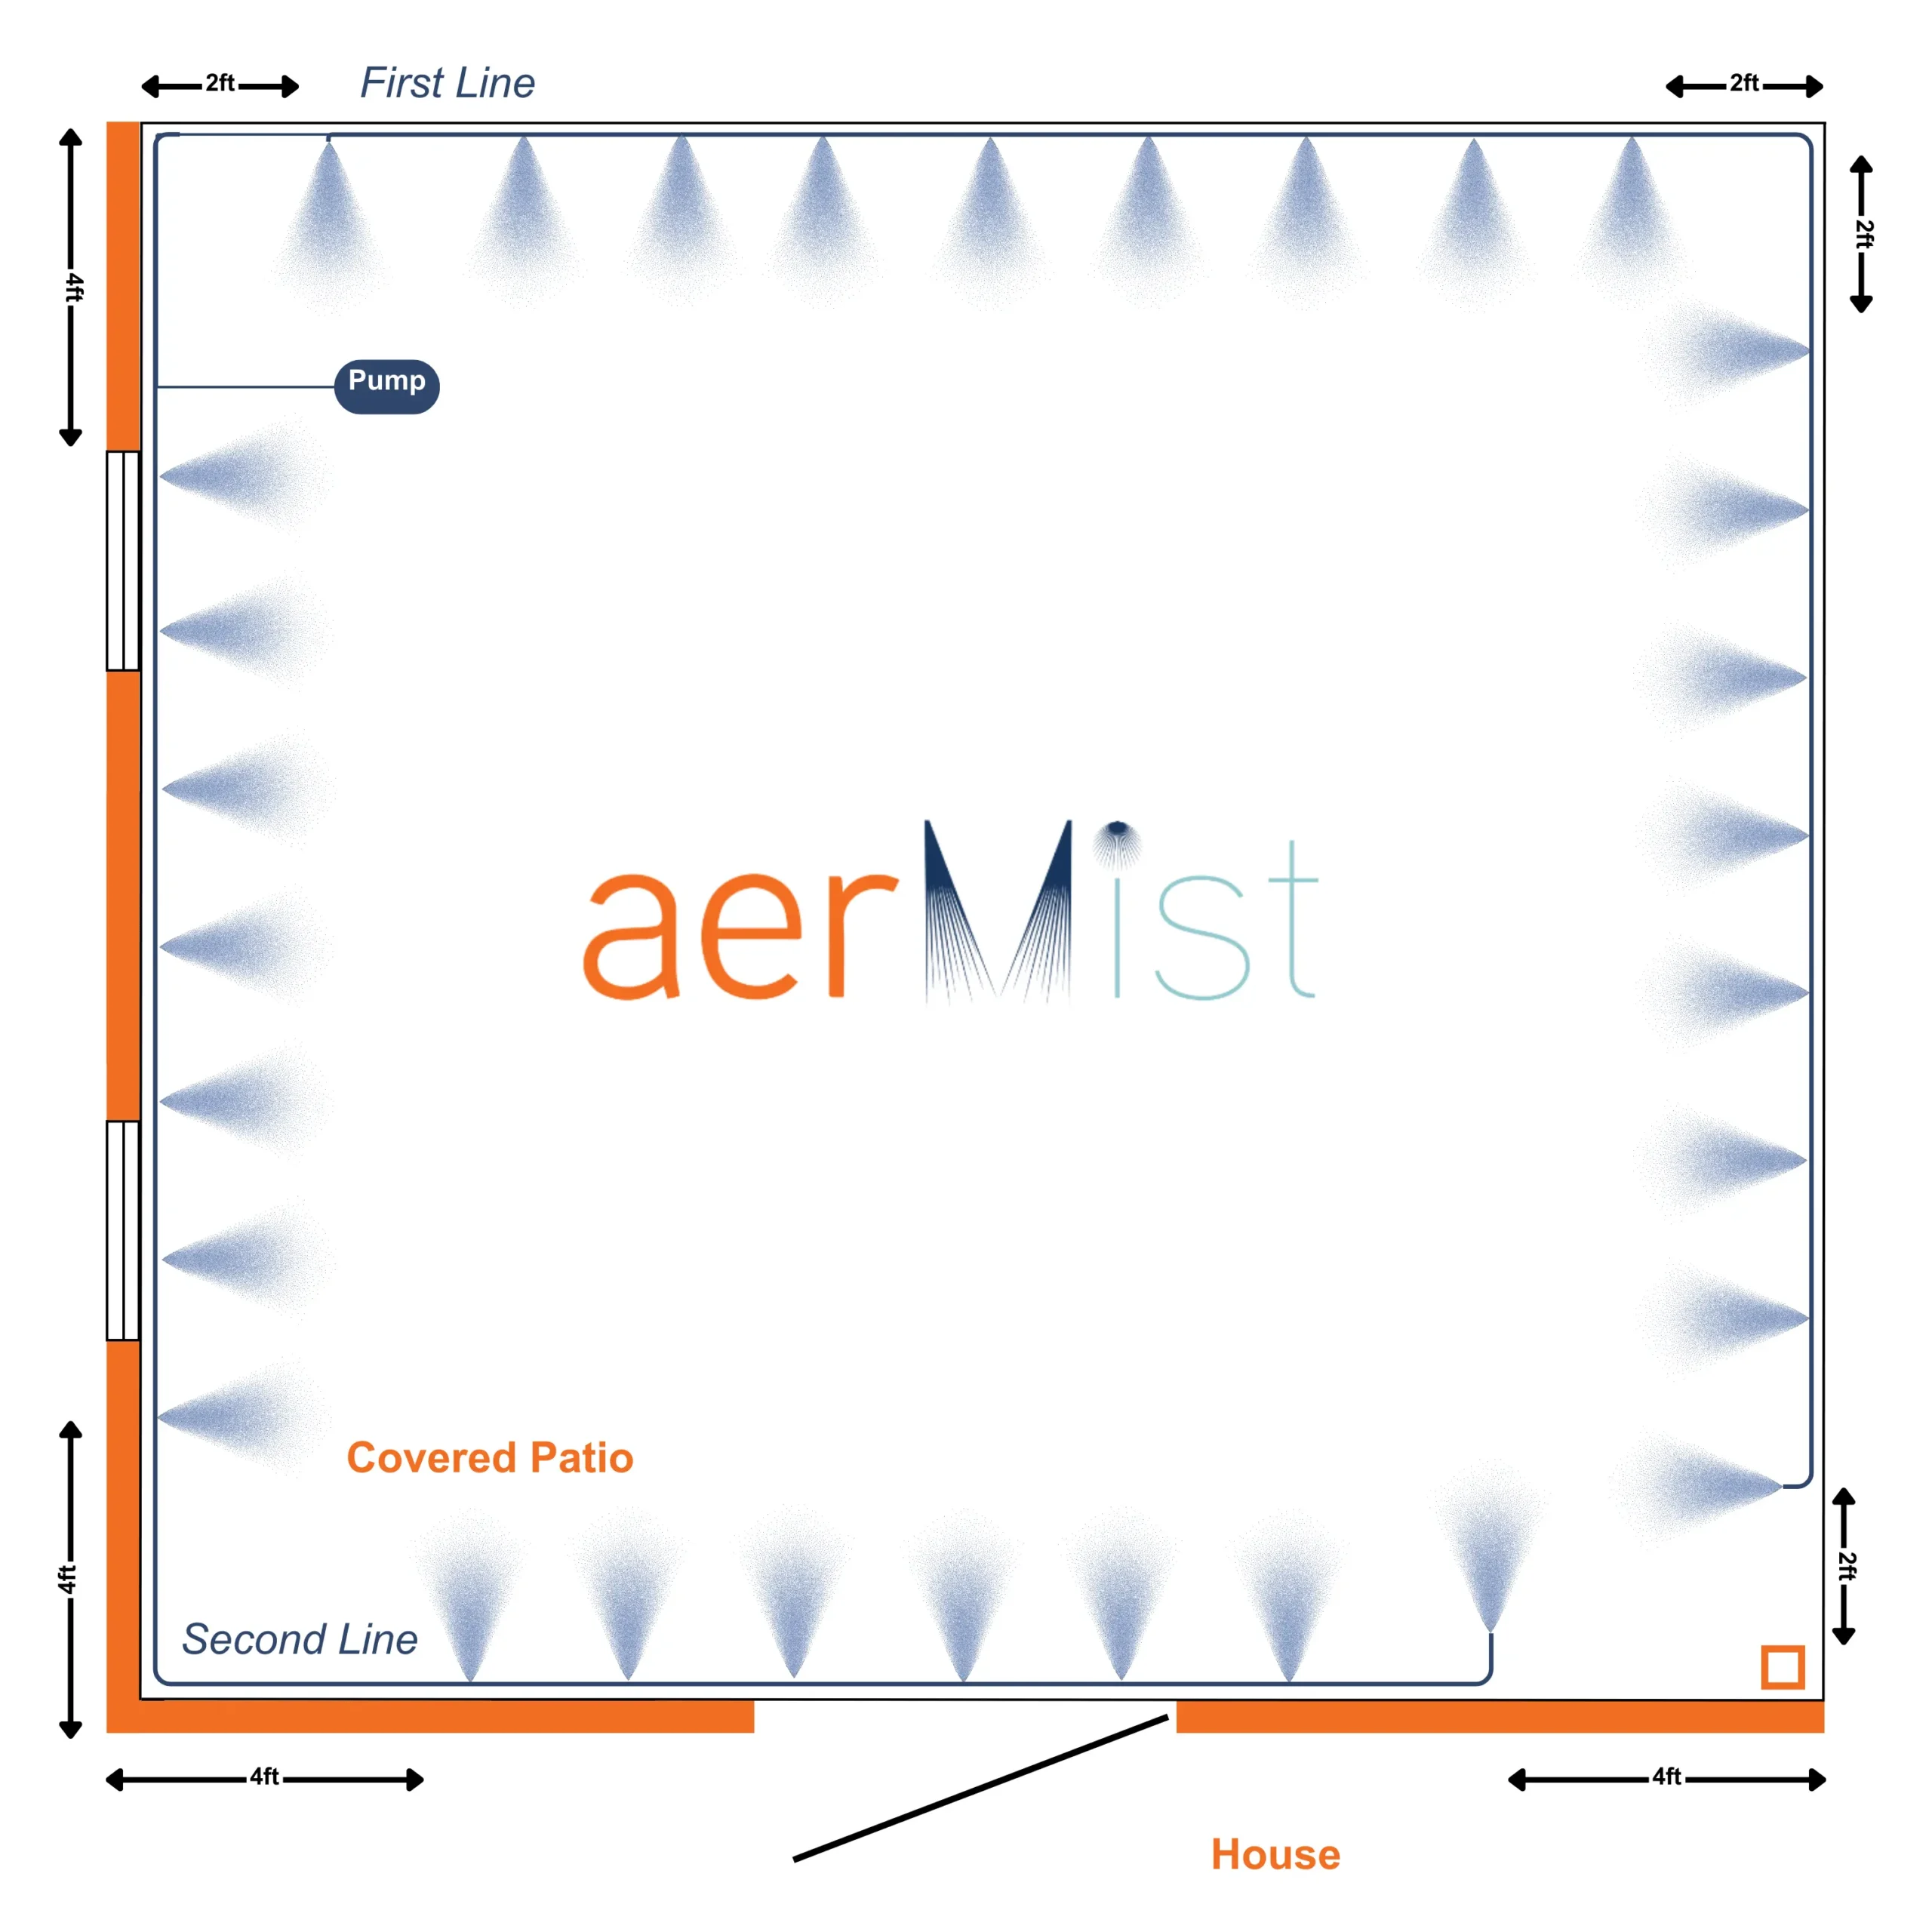
If 4 sides are not sufficient to install the recommended number of nozzles, additional inner lines can be installed providing that each inner line is at least at these distances from the next parallel line:
When hard overhead construction is not available, string cable lights or steel cables can be used to hold the misting lines.
When using string cable lights or steel cables, we recommend using only plastic tubing and zip ties to secure tubing to cables.
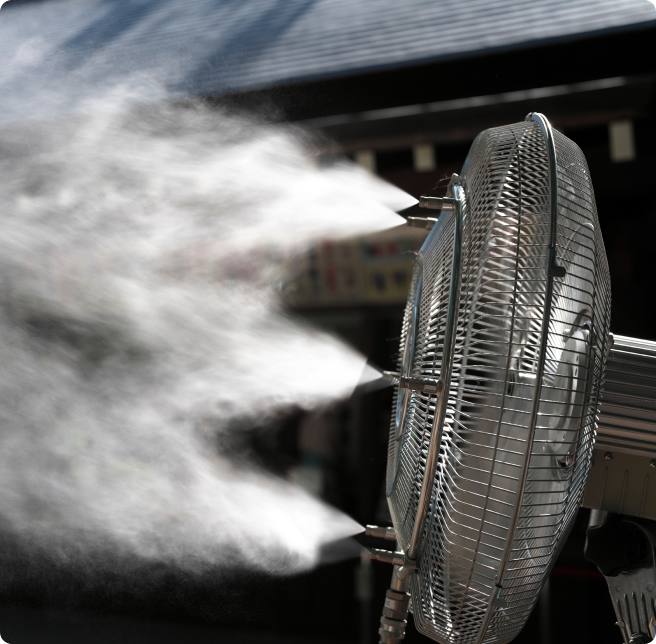
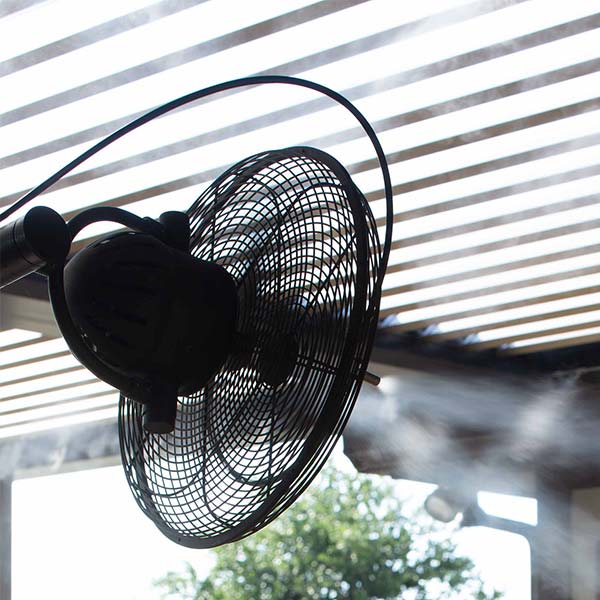
If no overhead options are available, you can also attach misting nozzles to outdoor fans for spot cooling.
To avoid creating oversaturated pockets and water collecting on surfaces, follow these nozzle placement rules:
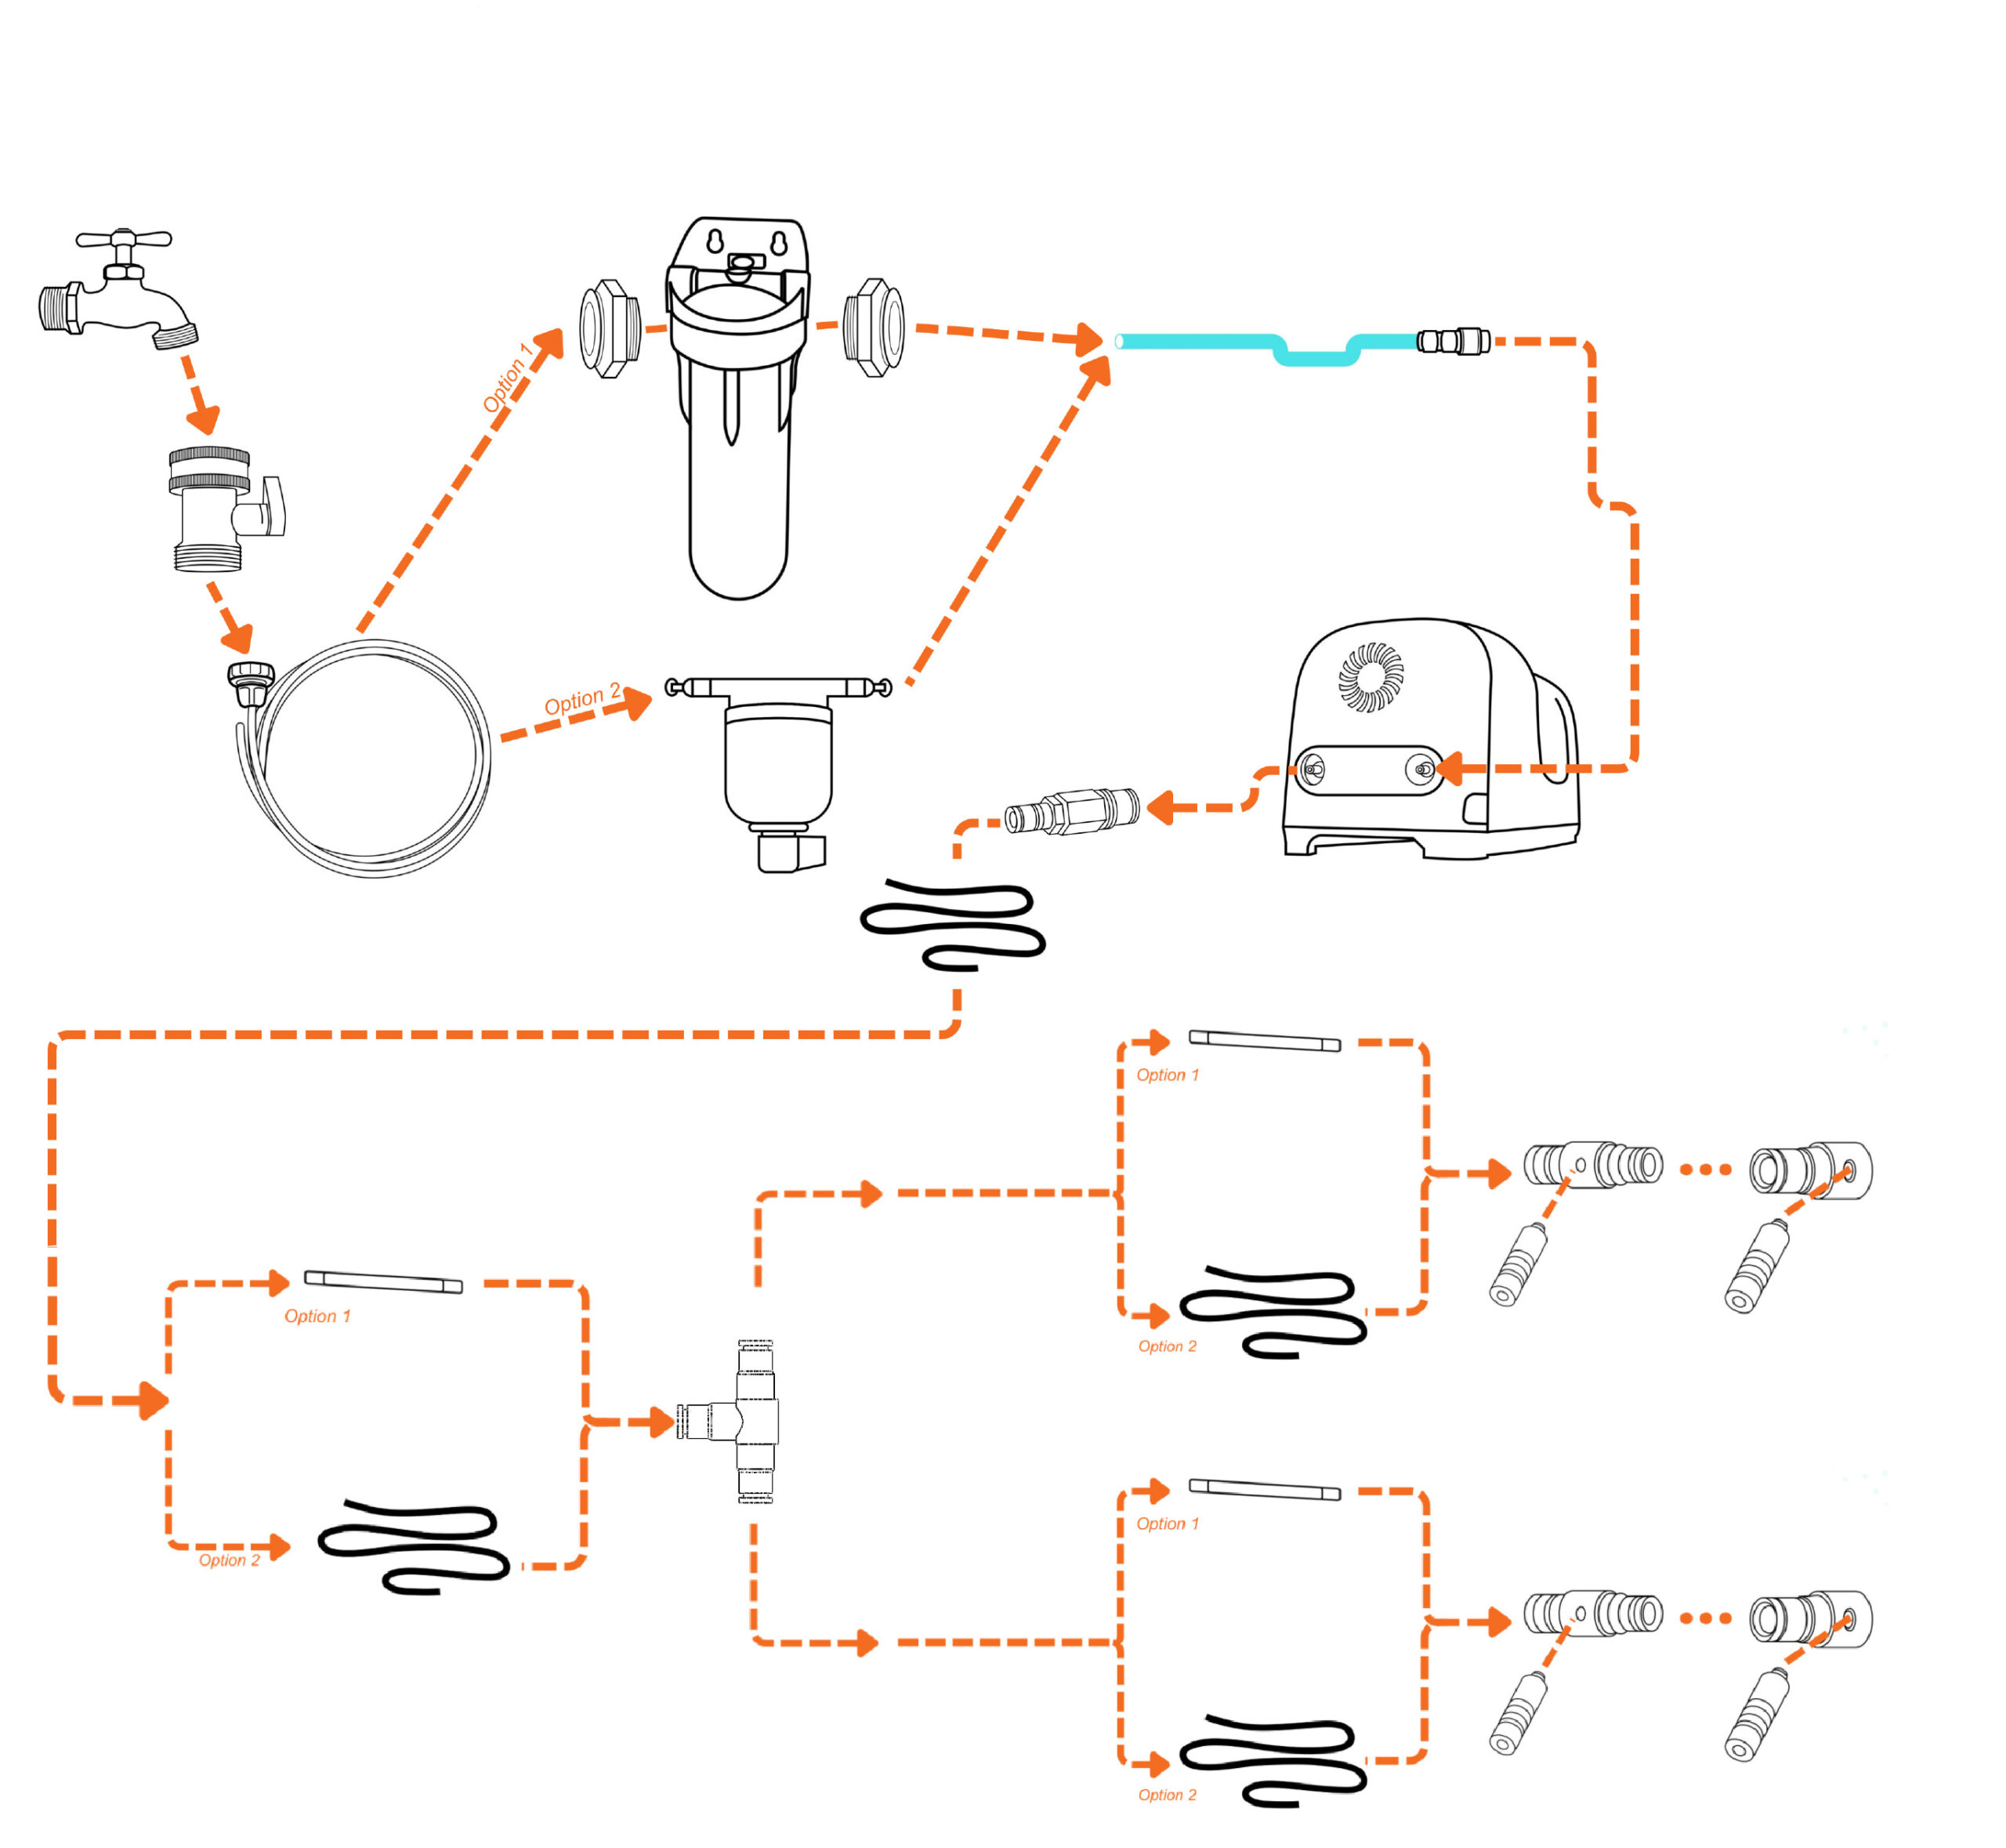
For the Model 300A pump, the high-pressure supply line must be connected in the middle of the misting line using a T-fitting.
One side of the T fitting connects to half of the nozzles, the other side to the remaining nozzles. This ensures proper flow and pressure along the entire misting line.
Note:
If more than 15ft of plastic tubing is needed to connect the pump to the misting line, use 3/8 inch tubing (instead of 1/4 inch) for the high-pressure supply line.
We often get asked which tubing type is better. In general, stainless steel tubing is the best option as it produces nice, straight lines and it looks great when installed. It will also outlast plastic tubing.
Plastic tubing is harder to install straight because it stretches and bends under pressure, making it less ideal for perfectly straight lines.
However, plastic tubing is a better choice when installing:
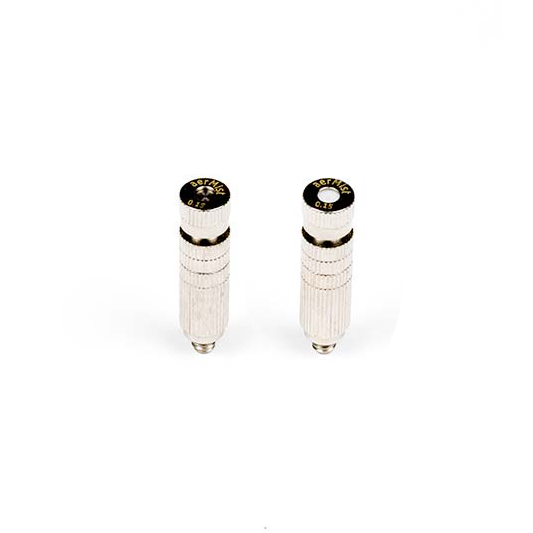
Misting nozzles come with two types of orifice materials: ceramic and stainless steel.
Ceramic Orifice Nozzles:
Stainless Steel Orifice Nozzles:
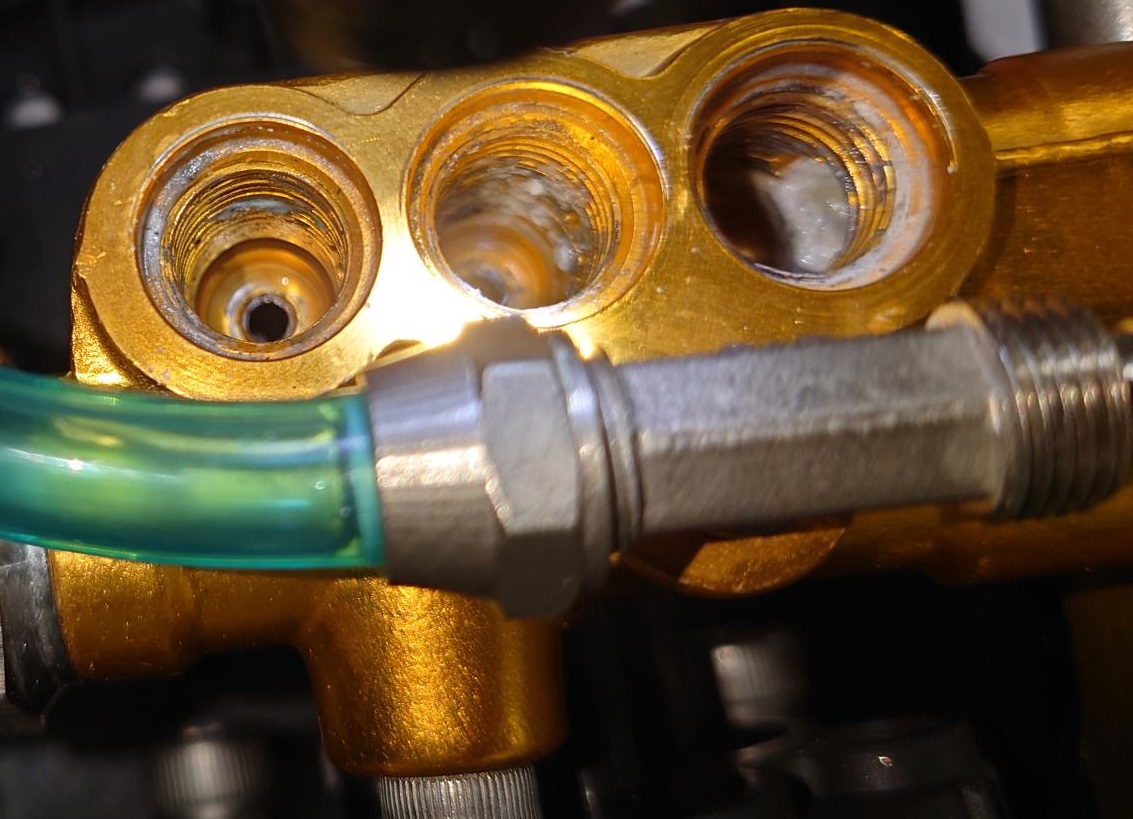
This line connects the pump outlet to the misting line. The first 4-5 feet should be plastic tubing because rigid tubing can’t be connected directly to the pump due to vibrations.
After that, you can use either plastic or stainless steel tubing. If you’re installing a stainless steel misting kit, it can look better to make the vertical section (the part that runs up the wall or post to connect to the misting line) stainless steel as well.
This makes the installation look cleaner and more professional. If you choose this, you’ll need extra stainless steel tubing and straight fittings (without nozzle ports) since stainless steel misting kits typically come with plastic tubing for the high-pressure line by default.
Our stainless steel tubing can be cut to fit corners perfectly, eliminating the need for small pieces of plastic tubing at corners, which improves the look of your installation. Please contact us for more details on how to cut stainless steel tubing.
Try to avoid having too many transitions between plastic and stainless steel tubing, especially on the misting line.
Plastic tubing has a smaller inner diameter than stainless steel, which causes water to expand or contract as it moves between the two.
Too many transitions can cause vibrations, leading to increased noise and potential leaks at the nozzles.
It’s fine to use plastic tubing for the high-pressure supply line and stainless steel for the misting line, but try not to use plastic tubing for corners or bends too often in the stainless steel misting line.
You can turn outdoor-rated fans into high-pressure misting fans by adding misting nozzles. You can use misting rings or plastic tubing with fittings that have nozzle ports.
Misting rings work with 18-inch fans or larger. For plastic tubing, use straight and end fittings with nozzle ports to attach the nozzles.
Secure the misting ring or tubing with zip ties. Smaller fans should have 2-3 nozzles, while larger fans can have more.
Proper water filtration is crucial for the longevity of your misting system. Fine sediment and calcium scale are the main causes of pump and nozzle failure.
To protect your system, all water entering it must be filtered to remove large sediment and debris, which can damage the pump pistons and cylinders.
The included stainless steel filter effectively removes large particles. For extra protection, you can use an optional carbon filter to also remove fine sediment and chlorine, helping to prevent clogged nozzles and reduce chlorine odor in the mist.
If your water contains minerals like calcium, magnesium, and iron (known as “hard water”) or fine sediment, we recommend using a filter with a built-in scale inhibitor. This helps prevent scale buildup, which can cause dripping nozzles, clogging, and premature pump failure.
Please note: damage caused by scale or fine sediment is not covered under the warranty.
Please see our installation video below for more installation details.

Don’t let the heat keep you indoors. With aerMist, you can enjoy your outdoor spaces all summer long.
Shop with confidence with our full three year guarantee.
Misting kits ship free with short transit times.
Trusted by thousands for our expert service and quality.